Quick answer: Choose garment bags for storage around the clothes on their hangers and the available wardrobe space. Check width, depth, hanging height, and the opening needed to remove a garment. For a cover that holds several pieces, review the rail attachment and access to the back of the group. Match the material and care method to the garments, and keep items that require folded storage outside the hanging arrangement.
For brands, retailers, wholesalers, and Amazon sellers, fit and access provide a practical way to compare closet covers. Review individual covers and larger rail-mounted designs with the garments they are meant to hold. The differences become clearer when someone opens the cover and retrieves clothing from it.
Which type of garment storage cover does the customer need?
Choose between an individual cover and a multi-garment wardrobe cover according to how the clothing will be grouped and retrieved. The two formats can serve different needs even when both are described as hanging garment bags.
A useful product offer explains what the customer is enclosing, how the enclosure is supported, and how someone reaches the clothes.
Individual covers for separate garments
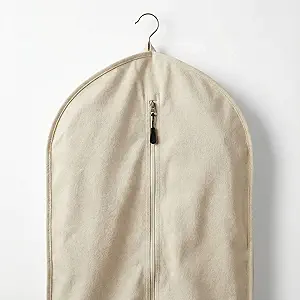
An individual cover surrounds one garment or a defined small group, depending on its design and dimensions. The hanger usually provides the support for the clothing.
This format can suit a customer who wants to identify and remove one item independently. Width, length, and any gusset still need to match the clothing.
Avoid assuming that a long cover fits every long garment. A full skirt, broad shoulders, or a thick coat can require more width and depth as well as height.
Multi-garment covers for a section of the rail
A larger wardrobe cover can enclose a group of garments on a clothing rail. The design needs enough room around the hangers and a practical way to open the front.
Check how the cover attaches and whether the clothing remains supported by the wardrobe rail. The enclosure and rail may perform different roles.
This distinction should appear in the product images. A customer needs to know whether the product is a cover for an existing rail, a bag suspended from its own hook, or another structure.
Covers and freestanding wardrobes are different products
A wardrobe cover may require a rail or frame that the customer already owns. A freestanding wardrobe includes a supporting structure only when that structure forms part of the supplied product.
Show the included components clearly. An image of a cover around a clothing rack can otherwise suggest that the rack comes with the purchase.
For a brand range, separate these categories in descriptions and packaging. This helps customers understand what they need at home before assembling the product.
Confirm any intended travel use
A closet cover may be designed to remain in place and may not have the handles, folding arrangement, or reinforcement needed for transport. A zipper alone does not make it a travel garment bag.
Describe the intended household use and handling method. If travel is an additional application, confirm it for the actual construction.
This guide focuses on storage within a wardrobe. Product selection for flights, luggage handling, and travel packing involves separate decisions.
How do you measure for garment bags for storage?
Measure the garments while they are on the hangers they will use, then measure the available wardrobe space. Compare those measurements with the cover’s width, depth, hanging height, and opening arrangement.
The garment label size alone cannot establish fit. Hanger shape, garment thickness, shoulder construction, and the way several pieces sit together all affect the space needed.
Measure hanging height from the right point
Identify where the cover begins relative to the rail or hanger hook. Then measure down to the lowest part of the intended garment arrangement.
A product’s overall height may include a top section that does not provide usable garment length. Ask how the dimensions are defined before comparing them with the clothing.
Leave the clearance required by the design at the bottom. A hem should not be forced into a fold merely because the cover is described as suitable for coats or dresses.
Allow for shoulder width and hanger shape
Measure across the widest relevant part of the garment and hanger arrangement. Broad hangers or structured shoulders can occupy more room than a flat garment measurement suggests.
Check the corners of the cover when the clothing is inside. If the sides press against the shoulders, a larger width or different shape may be needed.
A window and zipper can also affect how the front lies across the load. Review the cover closed, not just hanging open with the clothing exposed.
Measure the depth of a realistic group
For a multi-garment cover, depth depends on the thickness of the clothing and the spacing between hangers. Thin shirts and thick coats create different loads.
Arrange the intended group on the rail first. Check whether individual garments can still move enough to be removed without pulling the whole group forward.
Do not derive a universal garment count from depth alone. A photograph of a defined clothing group helps explain capacity, but the result still depends on the garments used.
Check the rail and nearby hardware
Record the rail’s shape and dimensions where the cover will attach. Include brackets, dividers, and other components that may interrupt the attachment path.
A wrap-around top closure may work on one rail layout and conflict with a bracket on another. A sleeve or small opening can impose different installation requirements.
Ask whether the cover can be fitted without removing the rail. This can matter to a customer using a fixed wardrobe system.
Check the doors and opening space
A cover can fit inside a wardrobe while its open panels interfere with a door. Sliding doors may expose only part of the covered group at a time.
Operate the cover in the actual space or a measured representation of it. Open the zipper, move the panels, remove a garment, and close everything again.
Also check the area below. A cover that touches shoes or storage boxes may need a different height or a revised arrangement of the wardrobe.
Use a reference model without assuming universal fit
Great Shine’s garment storage cover page illustrates a grey wardrobe cover measuring 22 inches wide, 21.5 inches deep, and 43 inches high, approximately 56 × 55 × 109 cm.
Those dimensions refer to the illustrated model. Use them to understand its proportions, then compare the actual garment and wardrobe measurements before selecting that configuration.
The same page states that dimensions and other details are specified for each order. A reference photograph is a useful starting point, but the selected sample should establish the final fit.
Which materials should buyers compare?
Compare the complete body construction, viewing panel, seams, and care instructions. A material name helps describe the product but does not establish all of its protective or maintenance properties.
The right choice depends on the clothing, location, expected handling, and how the customer wants to identify the contents.
Non-woven bodies need a clear specification
Non-woven describes a type of textile construction rather than one universal performance level. Ask for the composition and relevant material details of the proposed model.
Review how the body hangs, folds, and behaves around the zipper and top attachment. A broad panel and a narrow individual cover may place different demands on the same material.
Check the care instructions for the finished product. Do not assume that a non-woven cover is washable or has a particular lifespan without supporting information.
Woven fabrics also vary by construction
Polyester, canvas, and Oxford-style fabrics can appear in storage covers, but those names do not fully describe weight, backing, coating, or finish. Confirm the selected material.
Assess the way the cover hangs around the garments and how much space it occupies when folded. A heavier body may feel different to handle, while the zipper and attachment still need suitable support.
Choose fabric details that serve the intended use. A stronger-looking weave does not remove the need to review seams, closures, and care limits.
Evaluate the viewing panel separately
A clear panel can make the contents easier to identify, particularly when several covers share a wardrobe. Its position should match where the user can see it.
Confirm the window material and construction separately from the main body. The seams joining different materials deserve review during sample handling.
Avoid describing a large clear area as breathable merely because the rest of the cover uses fabric. The entire layout affects how the enclosure behaves.
Use breathability language carefully
Customers searching for breathable garment bags are often trying to avoid unsuitable enclosed storage. Explain the selected construction without promising a result that has not been measured.
A textile panel may permit air movement differently from a film panel, but that does not establish that the complete cover prevents moisture accumulation in every wardrobe. The garments and room conditions matter too.
Use terms such as woven body, non-woven body, mesh section, or clear viewing panel where accurate. If a specific airflow claim is important, request evidence for the relevant construction.
Consider special garments separately
The Canadian Conservation Institute advises against hanging certain fragile, heavily decorated, or structurally vulnerable textiles in its basic textile care guidance. That source addresses collection care, where requirements can exceed those of ordinary clothing.
Its relevance here is the need to consider the garment’s condition and support. Choose hanging or folded support according to the textile’s needs before selecting its cover.
For valuable or delicate items, follow the garment’s care guidance and seek specialist advice where needed. Avoid presenting an everyday wardrobe cover as an archival preservation system.
Which opening makes clothes easiest to retrieve?
Choose the opening around the way customers reach the garment group. The panels should move far enough to allow access without pulling against the clothes or the rail attachment.
Compare the cover in both a full wardrobe and a partially filled one. The opening’s position matters most when neighboring items restrict movement.
A central opening provides a direct route
A vertical zipper can provide access through the front of the cover. Its usefulness depends on the available width and how far the panels can move aside.
Check access to garments at the edges or rear of a deeper cover. A narrow front opening may be easy to use for one item while making a larger group difficult to reach.
Look for contact between the zipper path and loose fabric on the garments. The cover should allow the user to operate the closure without dragging it across clothing.
A wider opening can improve access to a group
A T-shaped or other multi-directional opening can expose more of the front, depending on the design. Check the junction and the way the panels hang when open.
Great Shine’s illustrated grey cover uses a T-shaped zipper opening. That feature should be reviewed on the selected sample, including the zipper specification and access around the actual clothing group.
A wider opening still needs enough space in the wardrobe. It may offer little benefit if a door or neighboring cover blocks the panels.
Review side openings in their intended position
A side zipper can suit a particular layout, but it becomes awkward if that side faces a wall or another close-fitting cover. Decide which side the customer can reach.
For a range sold in several configurations, make the opening orientation clear in the images. Customers should not have to infer it from an angled photograph.
If the model can be reversed or repositioned, confirm that the top closure, window, and other features still work in that arrangement.
Inspect the zipper with garments inside
Open and close the sample around the intended load. Check corners, junctions, and places where the body material can fold into the zipper.
A neat empty-product demonstration does not reveal every point of contact with clothing. Include long hems, sleeves, and the garment thickness relevant to the offer.
If the zipper becomes difficult to operate, investigate fit and loading as well as the zipper itself. A cover that is too tightly filled can create problems elsewhere in the construction.
Make the open panels manageable
Observe where the front panels go while someone removes a garment. They should not require an awkward extra grip or obscure the rest of the clothing.
If the design includes a way to hold panels aside, show and evaluate that feature. Do not add a fastening to the product description based on an illustration that does not match the sample.
An inconvenient closure may be left open. Include ordinary retrieval in the review so you can see how much effort it takes to use the cover as intended.
How should a wardrobe cover be installed?
Install the cover according to its actual attachment design and the instructions for the supporting wardrobe. Confirm the rail arrangement before adding clothing or closing the enclosure.
A cover’s top fastening and the rail’s capacity are separate matters. The product instructions should make clear which part supports the garments.
Identify the attachment method
A hook-and-loop wrap, sleeve, grommet opening, and independent hanging hook each require different installation steps. Confirm which construction the customer receives.
For the grey reference cover on Great Shine’s page, the top wraps around the wardrobe rail with a hook-and-loop closure. Rail size and nearby brackets therefore belong in the fit review.
Do not imply that the same arrangement applies to every cover in a product family. Show the selected model’s top in a close-up image.
Keep the load on the intended support
Confirm whether hangers rest directly on the wardrobe rail or on a component supplied with the cover. Follow the stated limits for all supporting parts.
A textile enclosure should not be treated as a load-bearing bag unless it was designed and evaluated for that role. The presence of a top closure does not establish a carrying function.
Check the arrangement with the sample loaded as intended. Look for unwanted tension at the top and for parts of the body pulled out of shape.
Fit around fixed obstructions
Wardrobe brackets, central partitions, and adjacent shelves can obstruct a top closure or opening. Include them in the sample layout.
A product that fits an open clothing rack may behave differently in a fitted wardrobe. Review the configuration that the listing is intended to represent.
If installation requires moving other garments or removing a rail, state that clearly. Customers need to understand the setup before purchase.
Confirm the finished position
Once installed, check the bottom clearance and the way the side panels hang. The cover should not be forced against the furniture to make it appear straight.
Open the front and remove a garment from more than one position. Then close the cover and operate the wardrobe doors.
Record this sequence as part of the installation review, with photographs that show the access available when the cover is open.
How should clothes be prepared before storage?
Prepare clothing according to its care instructions, make sure it is dry, and choose suitable support before placing it inside a cover. The cover should enclose a sound storage arrangement rather than compensate for an unsuitable one.
This preparation is especially important when clothes will remain unused for a long period. It also helps customers understand what the product can and cannot do.
Check care requirements before choosing hanging storage
Some clothing is best kept folded, while other garments suit hanging. Woolmark recommends folding knitted wool garments and using shaped or padded hangers for woven wool garments in its wool care guidance.
Use that distinction when planning a product demonstration. A hanging cover should show clothing appropriate for the selected support method.
Avoid treating every sweater, coat, or dress as the same storage problem. Construction and condition matter alongside the broad garment category.
Clean and dry the garments
Follow the relevant cleaning method and inspect the clothing before storage. Attend to stains, loose fastenings, and repairs that should not be left until the next season.
Check that the garments are fully dry, including thicker sections and linings. Do not close damp clothing inside a cover as a way to put it out of sight.
The cover itself should also be clean and dry. Use only the care method confirmed for its complete construction.
Select hangers that fit the garments
Choose a hanger shape and size suited to the item. A cover cannot correct the way an unsuitable hanger supports the shoulders or waistband.
Check that the hanger also fits within the enclosure. A broad hanger pressing against the side panels can interfere with the cover even when the garment length is appropriate.
For a multi-garment demonstration, use the hanger types likely to appear in the intended household. A set of thin, identical display hangers may conceal a fit issue.
Keep the clothing group manageable
Leave enough space to remove one garment without pulling its neighbors forward. Try that action with the clothing group used in the demonstration.
Group by use or owner where that helps identification. A cover for occasional formalwear may need a different layout from one holding seasonal outerwear.
Leave the garment label and important care information accessible. The customer should not lose the information needed to look after the clothing simply because it is stored inside a cover.
How many garments can a wardrobe cover hold?
Capacity depends on the cover dimensions, garment thickness, hanger shape, and the space needed for access. Explain the demonstration conditions behind any fixed garment count.
Compare how easily the customer can retrieve the intended clothing group and close the cover afterward.
Define the clothing set before comparing samples
Select garments that represent the intended application and record what they are. Compare candidates using the same group.
A set of lightweight shirts demonstrates something different from a set of bulky coats. Changing the load between photographs makes comparison difficult.
If the product is offered for several garment categories, assess those categories separately. A single count should not imply identical capacity for every type.
Review the cover at different fill levels
A full load shows whether the sides, zipper, and top become strained. A partial load shows how the cover hangs when there is less clothing inside.
Check whether the viewing panel still provides a useful view and whether the front opening stays easy to operate. A cover should remain practical as clothes move in and out.
For buyers, these observations can inform the suggested use and photography. They may also identify a need for a different width, depth, or opening layout.
Allow room for the retrieval action
Clothing takes more than static hanging space to be usable. A person needs to move a hanger, turn a garment, and guide it through the opening.
Try removing an item from the middle and rear of the group. Then put it back without opening the entire wardrobe arrangement.
If the process repeatedly disturbs neighboring clothes, reduce the load or compare a different enclosure. Record the usable load after making that adjustment.
Describe capacity without a universal promise
Use dimensions and a clear clothing photograph as the foundation. If including a count, explain what was shown and avoid treating it as a guarantee for every customer.
Do not estimate the cover’s capacity from the number of empty hangers that fit on a rail. Garment thickness changes the result.
The listing should also show the cover closed with the same load inside. An open cover around an oversized group does not demonstrate a usable enclosed capacity.
How do different wardrobes change the product choice?
Wardrobes differ in rail height, door opening, depth, and internal divisions. Choose the cover for the actual arrangement rather than a room label such as bedroom or dressing room.
The following situations are hypothetical examples for evaluating fit. They are not customer projects or test results.
A fitted wardrobe with sliding doors
Only part of the rail may be exposed at one time. A wide cover can fit behind the doors while leaving its zipper or rear garments difficult to reach.
Place the sample where the customer would use it and slide the doors through their normal movement. Check whether the opening remains accessible.
A narrower cover or a different front arrangement may suit this layout better. The decision should follow the access trial rather than the biggest available dimensions.
A deep wardrobe holding winter coats
The clothing can occupy significant depth, especially when hangers and sleeves overlap. The cover needs room for that group without pressing its front against the doors.
Check the longest garment and the widest shoulder arrangement separately. A taller cover does not solve insufficient depth.
Consider whether seasonal and frequently worn items should share the same enclosure. Repeated access to one coat may be easier if it is kept outside a group intended for longer storage.
A wardrobe with a central rail bracket
A bracket can interrupt the top attachment even when the rail diameter is suitable. The cover may need to sit on one side of it or use a different compatible arrangement.
Measure the available rail section and check the fastening path. Avoid showing the cover wrapped through hardware that a customer could not realistically access.
Discuss any required design change with the supplier and review it on a sample. Cutting or modifying a finished cover at home should not become an unstated installation step.
Several covers side by side
Multiple wardrobe covers can separate garment groups, but the panels and zippers still need space to operate. A tightly packed row can restrict access to each unit.
Check the sequence for opening one cover without moving the others. Position windows and labels where they remain visible in that arrangement.
The rail must also be suitable for the total clothing load under its own instructions. Several covers on one rod do not establish the rod’s carrying capacity.
What should buyers inspect on a garment cover sample?
Inspect the cover installed around representative garments, then review opening, retrieval, cleaning requirements, and packing. Tie every observation to the model and configuration being considered.
These are proposed sample-review steps. Any formal performance claim needs a suitable test method and documented evidence.
Start with identification and supplied parts
Confirm which product version the sample represents. Record the body material, window construction, zipper layout, top attachment, and dimensions.
Check whether any hanger, support component, fastening accessory, or instruction sheet is included. This information should match the proposed retail offer.
Compare the sample with the product drawing and photographs. Resolve differences before using those images to describe the item to customers.
Inspect garment-contact surfaces
Look at seams, zipper edges, fastening areas, and the interior corners. Check for rough edges, loose threads, or exposed components that could catch clothing.
Pay particular attention where a clear panel joins the body material. Different materials may behave differently when folded or pulled during use.
Include an interior view in the review record, showing the surfaces that contact the intended garments.
Operate the opening under realistic conditions
Install the sample at the intended height and add the defined clothing group. Open and close it using the action customers will perform.
Note any need to support the body with an extra hand, move adjacent covers, or pull clothing away from the zipper. These observations help identify an access problem.
Agree any repeated-use evaluation before drawing durability conclusions. A few successful openings demonstrate operation, not a long-term life claim.
Review attachment and body shape
Check the top closure after the clothing has been retrieved and replaced. Confirm that it remains positioned as the design requires.
Observe whether the cover twists, pulls tight at a corner, or drops into contact with items below. Investigate the installation and dimensions as well as the material.
If changing the attachment or zipper layout, recheck the relevant actions on the revised sample. Those details affect how forces are distributed through the cover.
Check folding and unpacking
Fold the product as proposed for retail packaging and review how it opens again. Follow the agreed packing method.
Look at the viewing panel, seams, and zipper junctions after unpacking. Ask whether the customer needs any preparation step before installation.
Keep the packed size separate from the open dimensions. Customers use the latter for wardrobe fit, while the buying team also needs the former for packaging and logistics planning.
Confirm the care method
Ask for care instructions applicable to the whole product. A fabric’s care properties do not automatically describe a cover that combines it with film, closures, and other components.
If cleaning is part of a sample evaluation, use the confirmed method and review the finished fit afterward. Record any effect on the opening or attachment.
Do not publish washability as a selling point until it is confirmed for the supplied configuration. Instructions should be specific enough that the customer can follow them.
Which custom details are worth specifying?
Specify changes that improve fit, access, identification, or maintenance for the intended wardrobe. Review how each proposed change affects the opening, attachment, and space inside.
For a custom garment storage project, a useful brief explains the problem first. That gives the supplier a reason for the requested dimensions or structure.
State the use and support arrangement
Describe the garments, the hanger types, and whether the cover encloses one item or a group. Include the relevant wardrobe dimensions.
Explain how the top should attach and identify any fixed brackets or partitions. A drawing or measured reference can clarify a layout that is hard to describe in words.
If the design is intended for several rail configurations, identify them explicitly. A generic universal-fit claim should not replace checking those arrangements.
Set width, depth, and height separately
A request for a larger cover is incomplete. Identify which dimension needs to change and what that change is meant to accommodate.
Check the effect on opening reach and available wardrobe space. More depth may hold a thicker group while making access to the back more difficult.
Lock the dimensions on the approved sample and drawing. Keep the measurement points consistent across the supplier specification and retail images.
Choose the window for the viewing position
A clear panel should show information the customer needs, such as the garment category or color. Its height and width should suit the way the cover sits in the wardrobe.
A large window is not always necessary to identify a group. Compare the visibility with the handling and material requirements of the whole front panel.
If the product uses labels as well, decide where they remain visible when several covers sit together. Avoid placing them where an open door or neighboring unit hides them.
Define zipper and fastening details
Specify the opening layout and the parts the customer touches. Confirm the zipper and top closure on the sample.
Check whether the requested branding or label placement interferes with those areas. A logo should not make the grip or opening harder to find.
For structural changes, review the revised product before production approval. Update the product images and instructions if the change affects how the cover works.
Keep packaging tied to the final model
Show the correct installation sequence and identify the supplied components. A generic instruction card may omit a top fastening or opening detail unique to the model.
Confirm the folded product, retail pack, and carton arrangement separately. An updated window or body material can change how the product folds.
For US and European programs, agree the languages and product information required by the intended sales channels and markets. Do not assume one artwork version is suitable for every destination.
How should product images explain a wardrobe cover?
Use images that show the installed product, the opening, the attachment, and the dimensions customers need to check. Those views explain function more clearly than several similar closed shots.
Keep the same model and clothing load across the images. Mixing configurations can create a product promise the final sample does not support.
Show the cover in a believable wardrobe
Include enough surrounding furniture to establish scale and access. The doors should be able to move in the depicted arrangement.
Keep the clothing inside the dimensions of the cover. Avoid digitally enlarging the front or changing garment proportions to imply extra capacity.
If the image is an illustrative concept, it should not be used as proof of a specific model’s performance. Actual product photographs are the appropriate basis for model-specific construction details.
Show the top attachment clearly
A close-up should reveal how the cover meets the rail and whether a bracket can interfere. Make the selected fastening understandable.
Do not crop out a supporting component that the customer needs. If the rail or frame is not supplied, explain that in the listing.
This image can prevent confusion between an enclosure for an existing wardrobe and a freestanding storage product.
Show the opening during retrieval
Demonstrate how the front panels move and how a garment passes through. Keep the rest of the clothing in place.
A useful view can include an open panel and a visible zipper junction without staging an oversized load. The purpose is to explain access.
For a multi-garment cover, show enough depth to make the interior arrangement understandable. A flat front photograph can hide the difference between an individual cover and a deeper enclosure.
Make dimensions readable and consistent
Identify width, depth, and hanging height on the correct views. State whether the measurement includes the top attachment.
Use accurate metric and imperial values where appropriate for the market. Avoid rounding that changes whether a product appears to fit a tight space.
Dimensions should agree with the approved sample and written description. A customer’s fit decision may depend on a detail that looks minor in the artwork.
Which claims should buyers verify before using them?
Verify claims about water resistance, dust exclusion, insect protection, washability, and durability for the final product. A zipper or fabric name alone cannot establish all of these properties.
The scope of a claim matters. Describing a cover’s materials and closures is different from promising a level of protection under every storage condition.
Describe dust protection within the design’s limits
A cover can form a barrier between clothing and the surrounding wardrobe, but openings remain relevant. The top, bottom, seams, and zipper layout all affect the enclosure.
Show those details honestly. A rail opening or unclosed bottom should not disappear from product imagery.
If a more specific dust-protection claim is important, agree how it will be evaluated. Keep the claim tied to the conditions and configuration behind the result.
Do not equate a cover with pest treatment
A garment cover does not establish that clothing is free from pests, and a visible zipper does not establish a pest-proof seal. Existing garment and wardrobe problems need appropriate attention.
Avoid transferring a claim from a different product, such as an airtight container, to a textile wardrobe cover. Their constructions and openings differ.
For ordinary product descriptions, focus on the verified enclosure and storage function. Additional protection claims require their own support.
Check suitability for garments needing special care
An everyday storage cover is not automatically appropriate for historic textiles, wedding heirlooms, or other items needing specialist preservation. The garment’s materials, condition, and storage environment affect that decision.
Do not use museum-care guidance as an endorsement of a commercial model. Use that guidance to inform questions about support and material selection.
Where a customer’s garment requires special care, state the product’s confirmed construction and let the appropriate care guidance determine suitability.
Frequently asked questions about garment bags for storage
Are garment bags for storage the same as travel garment bags?
They can differ in construction and intended handling. A closet cover may be designed to remain on a rail, while a travel bag may include carrying and folding features. Confirm the actual product’s use rather than assuming that every zippered garment bag supports both tasks.
What is the difference between a garment bag and a wardrobe cover?
An individual garment bag usually encloses a defined garment or small group. A larger wardrobe cover can enclose several hanging pieces or part of a rail. The names vary, so compare dimensions, attachment, and supplied components.
Are breathable garment bags always the best option?
Suitability depends on the garments, construction, and storage conditions. A fabric description alone does not establish the performance of the full enclosure. Review the body, window, closures, and care guidance, especially for delicate or valuable clothing.
Can a wardrobe cover hold heavy coats?
Check the dimensions and the support arrangement. The clothing rail or supplied support must be suitable for the load under its own instructions. Also assess whether the coats can be retrieved without crowding the opening. A cover’s size does not establish a weight rating.
How do you choose hanging garment bags for a closet with a low rail?
Measure usable hanging height from the relevant attachment point and compare it with the garments on their hangers. Check the bottom clearance and the opening. A shorter cover may fit the wardrobe but still be unsuitable for a long garment.
Can garment storage bags be machine washed?
Only if the finished product’s confirmed care instructions allow it. The body fabric, clear window, zipper, attachments, and any reinforcement may have different limits. Follow the instructions for the complete model and dry it as directed before reuse.
Will a garment cover prevent wrinkles?
It does not guarantee wrinkle-free clothing. Fit, crowding, hanger support, garment fabric, and storage duration all affect the result. Choose enough space for the intended clothing and follow its care guidance when preparing it for wear.
What should a buyer request before choosing a model?
Request a drawing with defined dimensions, material details, the attachment and opening specification, care instructions, and a representative sample. Review it in the intended wardrobe arrangement. Ask for evidence supporting any performance claim planned for the listing.
Explore garment storage covers for your range
Choose the garments and wardrobe arrangement first, then compare covers that provide the necessary space and access. Review the top attachment, front opening, and care method on the selected sample.
View Great Shine’s custom wardrobe covers and garment storage bags to examine the illustrated designs and configuration options. Use the reference model to begin the comparison, then confirm the dimensions and construction that fit your product brief.