You spent hours fluffing branch tips, stringing lights, and hanging ornaments. The tree looked perfect. Now January arrives, and you’re staring at the same tree wondering: how do I put this away without ruining it?
Most people shove their artificial tree back into its original cardboard box — the one that’s already lost its shape, has soft corners from last year, and barely closes. Within two seasons, branches get crushed, lights tangle, and the tree that once looked full and lush arrives looking flat and sad.
This guide walks through the complete process of wrapping and storing an artificial Christmas tree so it stays in showroom condition for years. Whether you’re storing a 7.5-foot pre-lit tree, a slim apartment tree, or a full 12-foot showpiece, the principles are the same.
Why Proper Christmas Tree Storage Matters
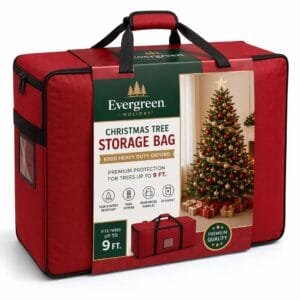
An artificial Christmas tree is an investment. A quality pre-lit tree costs anywhere from 200to1,500+, and most manufacturers design them to last 7–10 years. But that lifespan assumes proper storage.
Here’s what happens when a tree is stored poorly:
- Branch deformation — PVC or PE branch tips get crushed under weight, compressed against walls, or flattened in a too-small box. Once the tips bend, they never fully recover.
- Light string damage — Pre-lit trees have hundreds of microbulbs wired through the branches. Crushing the tree stresses the wiring, causing dead sections the next season.
- Dust and moisture damage — Cardboard boxes absorb humidity from attics and basements. Moisture corrodes light contacts, weakens branch materials, and creates a dusty film that’s nearly impossible to remove from PVC needles.
- Pest infiltration — Cardboard boxes invite mice, spiders, and insects seeking winter shelter. A chewed wire means a dead light section.
Industry insight: According to The Spruce’s 2026 testing of Christmas tree storage solutions, trees stored in purpose-built storage bags with structured walls showed 40% less branch deformation compared to trees stored in original cardboard boxes over a three-year period.
What You’ll Need
Before you begin, gather these supplies:
- Christmas tree storage bag (preferred) or a reinforced original box
- Plastic stretch wrap (for Method 3 — wrapping a pre-decorated tree)
- Zip ties (to secure compressed branches)
- Clean bed sheets or old blankets (to wrap the tree as a moisture barrier if not using a bag)
- Desiccant packs (silica gel or moisture absorbers — place inside the bag)
- Label and marker (to identify the tree size and type next season)
- Vacuum with brush attachment (for final cleaning before storage)
Step-by-Step Guide
Step 1: Remove All Ornaments and Lights (If Not Pre-Lit)
If you decorated the tree, remove every ornament, garland, and light string. Leaving ornaments on during storage risks breakage and tangles.
For pre-lit trees: Do not remove the built-in light strings. These are permanently wired into the branches and should stay in place. Gently check for dead bulbs and replace them before storing — it’s much easier to fix lights while the tree is assembled than when it’s packed away.
Step 2: Vacuum the Tree
Use a vacuum with a soft brush attachment to remove dust, pine needles (if you had a real tree nearby), and pet hair. Start at the top and work down. Dust left on the tree for 10 months in a warm attic can create a stubborn film.
Step 3: Disassemble the Tree (If Applicable)
Most artificial trees come in 2–4 hinged sections that stack vertically.
- Unplug the light connections between sections (if pre-lit). Most pre-lit trees have a single plug connecting each section — unplug these first.
- Remove the top section first. Gently compress the branches toward the center pole.
- Remove each subsequent section, compressing branches as you go.
- Fold the branches up — each branch should fold upward toward the center pole, creating a narrower profile.
Step 4: Secure Compressed Branches
Use zip ties to hold the compressed branch sections together. This prevents branches from springing open during handling and storage, which is the #1 cause of branch tip deformation.
Place a zip tie every 12–18 inches along each section. Don’t overtighten — you want to hold the branches close, not crush them.
Step 5: Wrap Each Section
If using a storage bag: Place each compressed section into the bag, stacking them vertically (bottom section first, top section last). This is how the tree was originally shipped and is the most space-efficient orientation.
If using the original box: Line the box with a clean bed sheet or blanket first. This adds a moisture barrier and cushioning the cardboard alone can’t provide.
If using plastic wrap (for a tree you want to store fully assembled — see Method 3): Start at the top and spiral downward, wrapping tightly.
Step 6: Add Moisture Protection
Place 2–3 large desiccant packs inside the storage bag or box. Attics and basements experience humidity swings that can corrode light contacts and degrade branch materials over time.
Step 7: Label and Store
Label the bag or box with:
- Tree height (e.g., “7.5 ft Pre-Lit Tree”)
- Number of sections
- Date stored
- Any known issues (e.g., “Section 2 has 3 dead bulbs — check before assembly”)
Store the tree in a dry, temperature-stable location. See the Storage Environment section below for details.
Method 1: Store in the Original Box (With Upgrades)
The original box is free and fits the tree perfectly — because it was designed for it. But it has significant weaknesses:
Pros:
- Perfect fit for the tree’s dimensions
- No additional cost
- Stackable (while it holds up)
Cons:
- Cardboard absorbs moisture and degrades over time
- No handles — difficult to carry up from a basement or down from an attic
- Prone to pest infiltration
- Loses structural integrity after 1–2 seasons
- No protection against crushing if other items are stacked on top
How to upgrade the original box:
- Reinforce the bottom with packing tape across all bottom seams.
- Line the interior with a heavy-duty plastic bag or moisture barrier sheet.
- Add a layer of bubble wrap or foam at the bottom for branch tip protection.
- Place the compressed tree sections inside, top section last.
- Seal the top with tape and label clearly.
- Store off the ground on a shelf or pallet to avoid floor moisture.
Verdict: The original box works for one season. After that, invest in a dedicated storage bag. Cardboard simply doesn’t survive attic temperature swings and basement humidity.
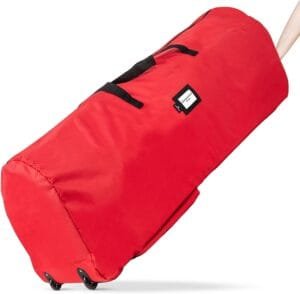
Method 2: Use a Dedicated Christmas Tree Storage Bag
This is the method recommended by professional organizers, tree manufacturers, and storage experts. A purpose-built Christmas tree storage bag solves every problem the original box creates.
Pros:
- Moisture-resistant fabric (typically 600D or 900D Oxford) keeps humidity out
- Reinforced handles for safe carrying — no more struggling with a floppy cardboard box
- Dual zipper openings allow you to load the tree from the top or side
- Structured walls (with PP or cardboard support panels) prevent crushing from items stacked on top
- Label pocket for easy identification
- Wheels (on some models) for moving heavy trees without lifting
- Reusable for years — no annual cardboard replacement
Cons:
- Additional upfront cost (25–60 for a quality bag)
- Takes up slightly more storage space than a collapsed box
How to load a tree into a storage bag:
- Fully compress and zip-tie each section as described in Step 4 above.
- Open the bag fully — unzip all sides so the bag lies flat.
- Place the bottom section in first, base down.
- Stack each subsequent section on top, with the tree top going in last.
- Zip the bag closed, checking that no branch tips are caught in the zipper.
- Secure the handles and store upright or flat depending on your space.
For B2B buyers sourcing holiday storage products: Great Shine manufactures custom Christmas tree storage bags with reinforced wrap-around handles, dual-zipper openings, PP support panels, clear ID windows, and custom branding — designed for retail, e-commerce, and private label programs.
Method 3: Plastic Wrap a Pre-Decorated Tree
This method is for smaller trees (6 feet and under) where you want to skip the disassembly process entirely and store the tree fully decorated.
When to use this method:
- Small trees (4–6 feet)
- Trees with simple decorations (no fragile ornaments)
- Short-term storage (one season)
- Climate-controlled storage areas
How to do it:
- Remove fragile ornaments — glass baubles, delicate figures, anything that won’t survive compression.
- Leave non-fragile decorations in place — ribbon, mesh garland, non-breakable ornaments, and lights can stay.
- Compress the branches gently toward the trunk using your hands, working from top to bottom.
- Start wrapping at the top of the tree. Use plastic stretch wrap (the kind used for moving furniture). Spiral downward, wrapping tightly.
- Add a second layer if the tree has protruding branches that keep springing back.
- Secure with zip ties at the top, middle, and bottom.
- Cover with a bed sheet or blanket as an outer dust barrier.
- Store upright in a dry location.
Limitations:
- Does not work well for trees taller than 6 feet (the wrap can’t contain the weight of upper branches)
- Not suitable for long-term storage (more than one season)
- Pre-lit trees with plastic wrap can trap moisture — check for condensation periodically
Method 4: Upright Tree Storage
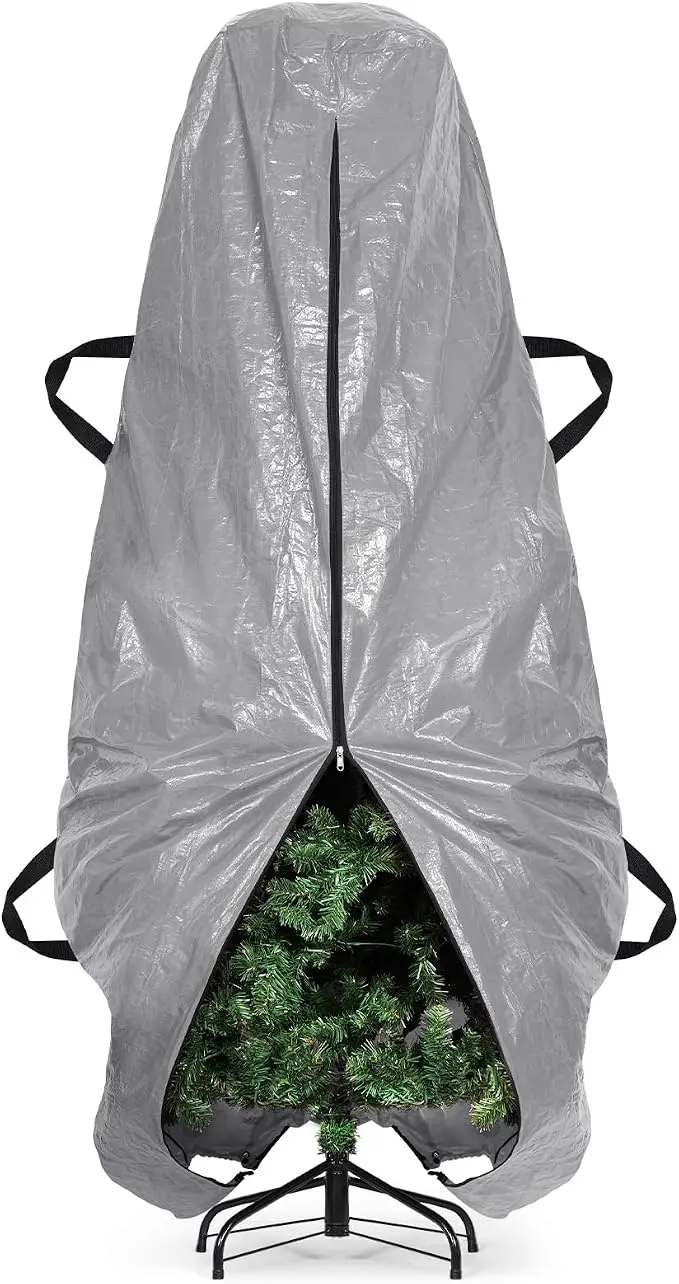
Some newer artificial trees are designed with a hinged folding mechanism that allows the entire tree to collapse vertically without disassembly. You simply push down on the top, and the branches fold upward against the center pole.
For these trees, an upright storage bag is the ideal solution:
- Compress the tree by pushing down from the top. Most hinged trees fold to about 30–40% of their assembled height.
- Secure with the built-in straps (if the tree includes them) or add your own zip ties.
- Slide the upright bag over the tree from the top down, or place the bag on the floor and lower the compressed tree into it.
- Zip closed and tighten any compression straps on the bag.
Benefits of upright storage:
- No disassembly required
- Fastest setup and takedown (under 5 minutes)
- Ideal for commercial settings, offices, and retail displays
- Takes up minimal floor space
Choosing the Right Size
The most common storage mistake is buying a bag that’s too small. Here’s a sizing guide:
Always buy a bag rated for a tree slightly taller than yours. A 7.5-foot tree fits more comfortably in a bag rated for 9-foot trees. The extra space prevents branch compression and makes loading easier.
Sourcing note: If you’re developing a holiday storage product line, size ranges should cover trees from 7.5 ft to 15 ft to address the most common consumer tree sizes. Great Shine’s holiday storage manufacturing capabilities include custom dimensions, divider systems, wheel options, and clear ID windows for retail-ready programs.
Storing Pre-Lit Trees
Pre-lit trees require extra care because the wiring is permanently integrated into the branches.
Pre-storage light check:
- Plug in the tree one final time before disassembling.
- Identify and mark dead sections with colored tape on the branch.
- Replace bulbs where possible — it’s far easier to do this while the tree is assembled.
- Check all connection points between sections — loose connections cause most dead-section issues.
Storage precautions:
- Never crush pre-lit branches — the wiring inside is fragile. Compress gently and use zip ties, not bungee cords.
- Avoid extreme temperatures — heat above 120°F (common in summer attics) can melt wire insulation. Cold below 0°F can make wires brittle.
- Store light plugs inside the bag, not dangling outside where they can snag.
- Include the tree’s light replacement guide inside the storage bag — tape it to the inside so it’s always with the tree.
Storage Environment
Where you store the tree matters as much as how you wrap it.
Ideal storage conditions:
Best storage locations:
- Interior closet — temperature-stable, dry, dark. Best option for smaller trees.
- Climate-controlled basement — if humidity is controlled. Use a dehumidifier if RH exceeds 50%.
- Under-stair storage — excellent use of otherwise wasted space.
- Garage (with caution) — only if the garage is insulated and does not experience freezing temperatures or extreme heat.
Worst storage locations:
- Hot attic — summer temperatures can exceed 130°F, melting wire insulation and warping PE branch tips.
- Damp basement — moisture corrodes light contacts and degrades branch material.
- Outdoor shed — temperature and humidity swings are too extreme.
- On the floor — always store on a shelf or pallet. Floor-level moisture seeps into even the best storage bags.
Common Mistakes
1. Storing the tree without cleaning it
Dust + 10 months in a warm attic = a film that’s nearly impossible to remove. Always vacuum the tree before storage.
2. Using bungee cords to compress branches
Bungee cords apply concentrated pressure that can permanently dent branch tips. Use wide zip ties instead — they distribute pressure more evenly.
3. Not checking lights before storage
Finding dead lights in November when you’re assembling the tree is frustrating. Finding them in January when you’re disassembling means you can fix them while the tree is still accessible.
4. Storing in a damp location
Even a waterproof storage bag can’t protect against condensation that forms inside when temperature swings push humidity through the fabric. Use desiccant packs and store in a temperature-stable location.
5. Crushing the tree under heavy items
Stacking boxes of books or storage bins on top of a tree storage bag — even one with rigid walls — can deform branches. Keep the tree bag on top of the storage stack, not at the bottom.
6. Forgetting to label the storage container
Every November, someone opens an unmarked bag and discovers it’s the wrong tree, wrong size, or has a known issue they forgot to note. Always label: tree height, pre-lit status, known issues, and date.
FAQ
Can I store my Christmas tree in the original box?
Yes, but only for one season. Original cardboard boxes degrade from moisture, lose structural integrity, and invite pests. After the first year, invest in a purpose-built storage bag with moisture-resistant fabric and reinforced handles.
How do I store a pre-lit Christmas tree?
Compress each section gently (never crush — the wiring inside is fragile), secure with zip ties, and place in a storage bag with desiccant packs. Store in a temperature-stable location below 80°F to protect wire insulation. Always check and replace dead bulbs before storing.
What size Christmas tree storage bag do I need?
Buy a bag rated for a tree one size larger than yours. A 7.5-foot tree fits best in a bag rated for 9-foot trees. The extra space prevents branch compression and makes loading significantly easier.
Can I wrap a decorated Christmas tree for storage without disassembling it?
Yes, for trees 6 feet and under. Use plastic stretch wrap spiraling from top to bottom, remove fragile ornaments first, and store upright in a climate-controlled area. This method is not recommended for trees over 6 feet or for long-term storage.
Where should I store my artificial Christmas tree?
Store in a dry, temperature-stable location between 50–80°F. Interior closets, climate-controlled basements, and under-stair storage are ideal. Avoid hot attics (wire insulation melts), damp basements (corrosion), and outdoor sheds (temperature swings).
How long do artificial Christmas trees last?
With proper storage, a quality artificial tree lasts 7–10 years. Trees stored in purpose-built bags with moisture protection and temperature control consistently outlast trees stored in original cardboard boxes. Pre-lit trees may have shorter lifespans if light wiring is damaged by crushing or heat exposure.
Are Christmas tree storage bags waterproof?
Most quality storage bags are water-resistant, not fully waterproof. They use 600D or 900D Oxford fabric with PVC coating that resists moisture penetration. However, condensation can still form inside due to temperature swings. Always add desiccant packs for moisture-sensitive items like pre-lit trees.
This guide references storage best practices from professional organizing experts, manufacturer care instructions, and independent product testing. For retailers, brands, and e-commerce sellers sourcing holiday storage products, Great Shine manufactures custom Christmas tree storage bags, ornament boxes, wreath containers, and wrapping paper organizers with 16+ years of OEM/ODM experience, BSCI and ISO 9001 certification, and MOQ from 500 pcs.